As we were walking home one night in Bristol my friend Rosie looked in a shop window and said I really want one of those and pointed to a macrame plant hanging basket. So I decided I would attempt making one for her birthday.
I will now try my best to explain how to make this in six simple steps (I hope). Please forgive me for my terrible photography skills.
What you will need:
Macrame Rope (you can use any kind but I chose 2ply twisted rope from here)
3" Ring (I used a Curtain pole ring)
Wooden beads- this is optional
Tape
Scissors
Plant pot
STEP ONE:
Cutting the rope.
Cut the 8 pieces rope, this all depends on the size of your hanger. I decided to cut mine to 8ft. It may feel like you have a lot of rope but trust me it will all come together eventually. Then loop the rope through the ring so the middle of the rope has folded over it. Try to make sure the rope is even but its not the end of the world if it is not perfect.
STEP TWO:
Wrap knot.
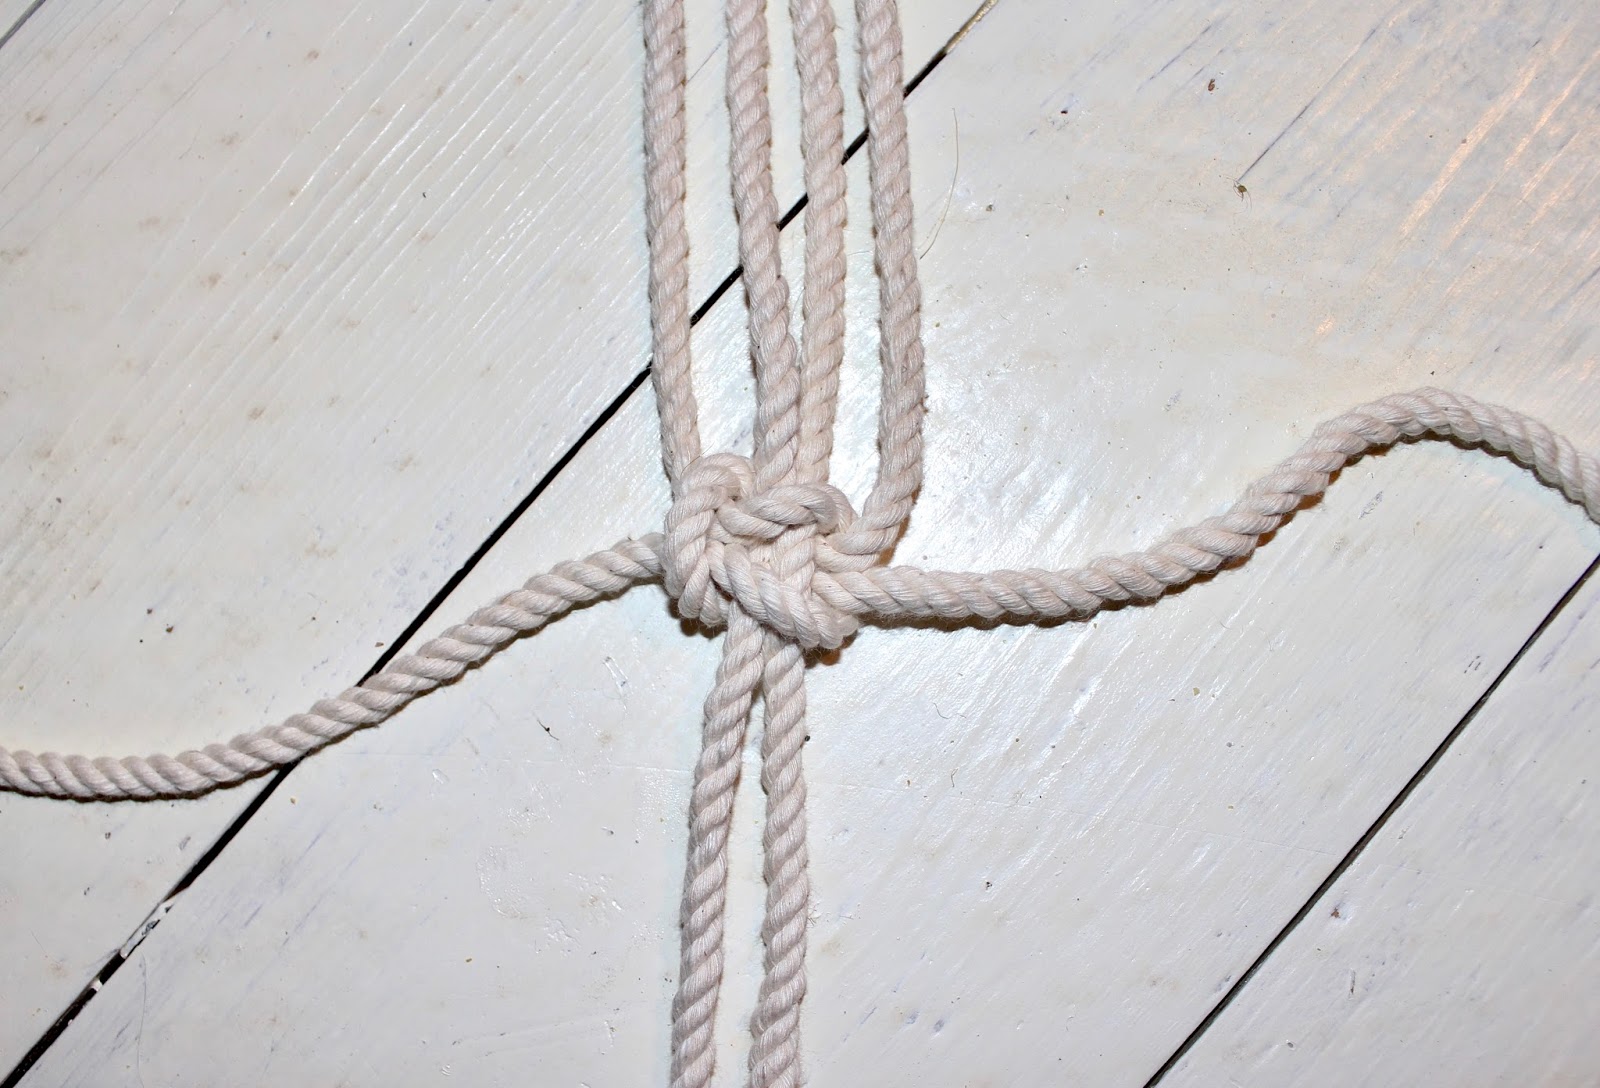
Now we are going to make a 'wrap knot'. confusing as it sounds once you have done it, you'll realise how simple it is.
Start by cutting another piece rope to about 5ft. Then make a 'V' shape, and start wrapping it round the 16 strands of rope, making sure there is a little rope poking out the top, this will be used later.
Once you have reached the end of the 'V' thread the rope through the hole. Then pull the piece of rope at the top that should be poking out still. This should secure the knot, everything should now be taught and sturdy. Then cut the excess pieces of rope.


STEP THREE:
Square knots.
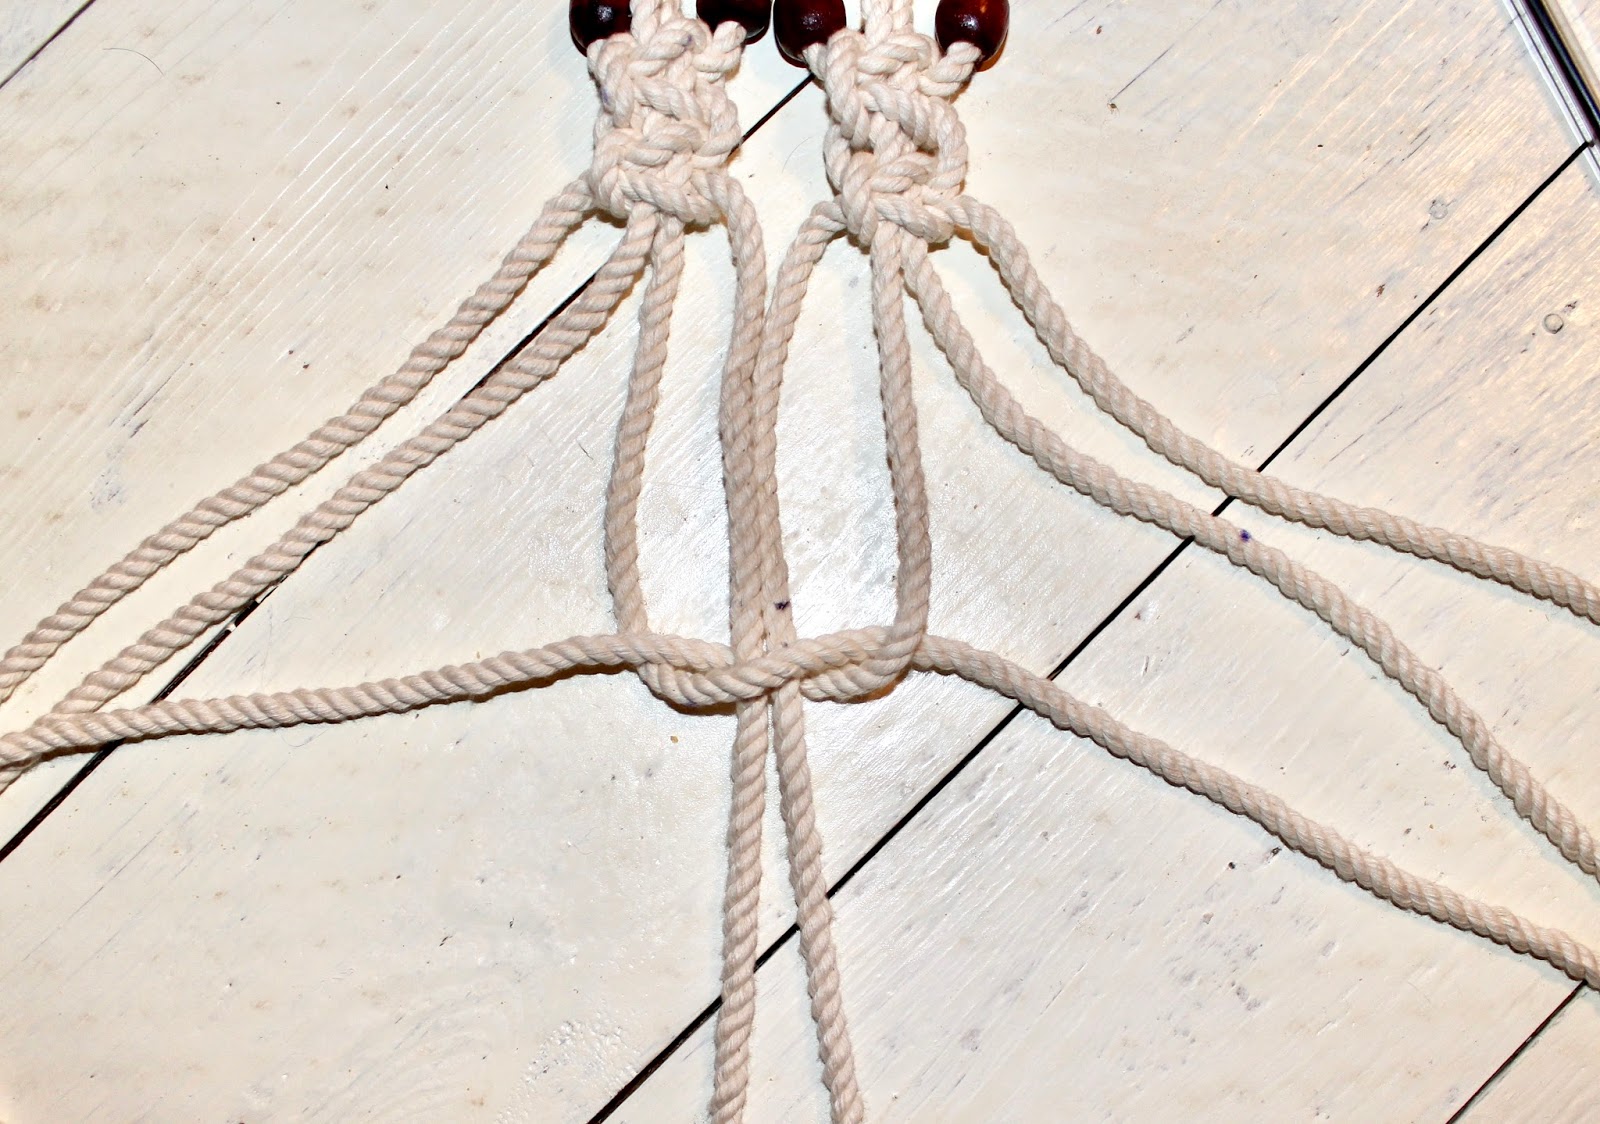
Now we will start on the square knots. These knots remind me of the Scooby Doo's that I used to make at school. Begin by separating your 16 strands into fours measuring 20" and make a mark, do the same for every strand, this is to assure your knots are all even around the pot.
Lay four of your strand out flat, thread the beads on the outer two strands. Then lay the left cord over the center cords and under the cord to the right. (I know very confusing) Then thread the right cord under the centre cords and up over the cord on the left. Pull slowly and gently to tighten, making sure you are lining the knot up with your measuring mark. Now to repeat this process going the opposite direction, lay the right cord over the centre cords and under the cord to the right. Thread the left cord under the centre cords and up over the cord on the right. Just do this one more time, and repeat the whole process on the other three lots.
STEP FOUR:
Second set of square knots.
By now you should start seeing the hanger slowly coming together. Now to repeat step three but this time taking two cords from adjacent groups of four. I measured 4" down making sure to mark the rope. It does start to get a bit fiddly, at one point I was having to use objects to hold it down to stop it from moving.
STEP FIVE:
One more wrap knot.
Put your plant in the hanger, adjust to suit and I used my hair band to tie the strands together whilst I adjusted everything one final time. This made it easier to start the wrap knot. Follow step one again. making sure the knot wraps are as tight as possible.
STEP SIX:
Tedious tassel making.
This stage is optional, but I liked the idea of having a tassel. It a long process but start by unwinding the twists in the rope. Honestly it look me almost two hours. I then used my straighteners and straightened the rope as it had ringlets from where it was twisted.
If you have any questions please contact me, I will do my best to help,
Good luck,
Coral
x x x


No comments
Post a Comment